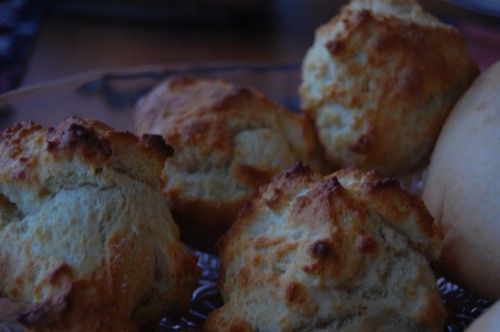
Scones
For my fist ever Daring Bakers challenge I had to make scones. This is some thing that i have done many times before but it's so good so I didn't mind at all! Moreover, it was a new kind of recipe and not at all as the ones I usually make. I use more of a Brittish style of recipe when I do mine, which has sour milk in it.
I thought that it would be a nice thing to do them for breakfast since its Friday after all :) And as scones are made quite quickly I didnät have to get up too early to make them. My boyfriend really liked the effort since we usually can't eat breakfast togeher.

These tasted great even though my dough was a little to wet. The rised very well and hade a very nice texture. I also noticed that the where lighter than the ones with sour milk in them. But i did miss that sour taste you get from the sour milk. And I will probably keep making the brittish scones but it's is good to have tried a new recipe and it's nothing wrong with this one I just prefer the taste of the brittish ones.
I didn't add anything to my scones but I think it would be great to have some herbs in them or rassins as Audax suggested. Maby even blueberries would make them even more delicious, but I'll have to wait for summer to arrive before I can try that.
The recipe can be found here: Audax Artifex
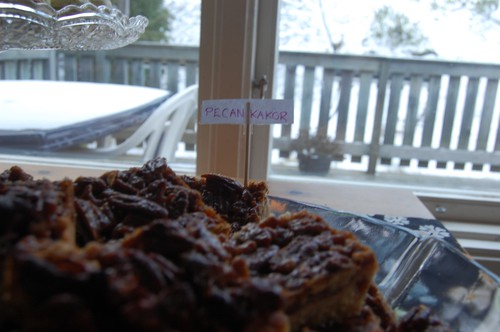
3: Pecan Pie Bars

What I will say though is that DON'T DO OTHER THINGS AS YOU'RE MAKING THE CARAMEL! I did this because i hade so much to do so I had to do several things at the same time. I thought I could melt make the caramel on low heat and that it would be okey but no. It wasn't terrible burt but on the edges you could taste just a bit of the burnt taste. But people still liked them so I guess I can't be to hard on my self.
Recipe from: The Cherry On Top
What You Need
For crust:
2 sticks unsalted butter, softened
2/3 cup packed brown sugar
2 2/3 cups all-purpose flour
½ teaspoon salt
For topping:
1 stick (½ cup) unsalted butter
1 cup packed light brown sugar
1/3 cup honey
2 tablespoons heavy cream
2 cups chopped pecans
What You Need to Do
Preheat the oven to 350ºF and line a 9×13-inch pan with foil, leaving enough for a 2-inch overhang on all sides.
First make the crust by creaming together the butter and brown sugar until fluffy in a stand mixer fitted with the paddle attachment. Add in the flour and salt and mix until crumbly.
Press the crust into the foil-lined pan and bake for 18 minutes until golden brown.
While the crust bakes, prepare the filling by combining the butter, brown sugar, honey and heavy cream in a saucepan and stirring it over medium heat. Simmer the mixture for 1 minute, then stir in the chopped pecans.
Remove the crust from the oven and immediately pour the pecan filling over the hot crust spreading it to cover the entire surface.
Return the pan to the oven and bake an additional 18 minutes (I will reduce the time to 16 minutes for a softer caramel. But this i just a matter of taste so if you want it harder keep the 18 minutes or even up to 20 minutes).
Remove the pan and allow the bars to fully cool in the pan.
Use the foil overhang to lift out the bars and transfer them to a cutting board. Peel off the foil, slice into bars and serve.
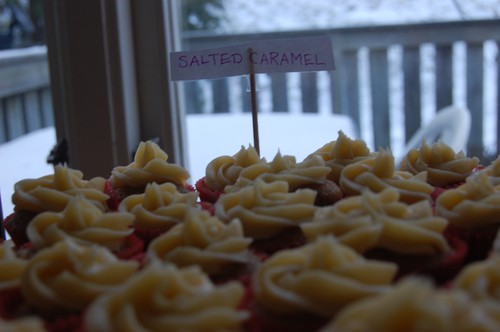
2: Salted Caramel Cupcakes
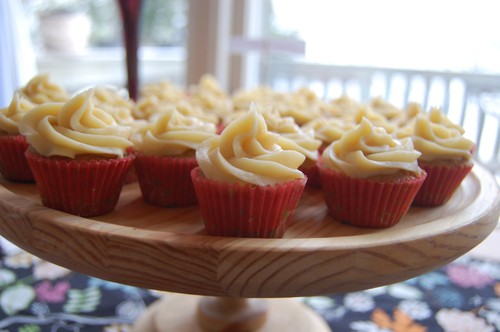
Next time I will add just a wee bit more salt though. I like to get that sting that you can get from salt when it's in something sweet. Maby put some sea salt on the top so it can work both as a decoration and make them even more tastefull.
And there is one more thing that make these thing a part of heaven. They have a caramel filled center! How can you say no to that! And when you make mini cupcakes, as these are, it's even better. I did make regulare cupcakes once and they need a bit more filling as they are bigger.
The recipe is from 52 Kitchen Adventures
Note: This time I didn't make the caramel as it says in the recipe, I just made dulce de leche instead becase it's a bit easier even if it takes much longer. To make it you just put a can of sweetened condensed milk in a pot and cover the whole can with water and let it cook for 2-3 hours. Yes it is a long time but you don't have any risk of burning and you just have to make sure that it's covered with water the whole time. When it's done let it cool and then just follow the recipe.
Salted Caramel Cupcakes
Makes 15 regular cupcakes
Brown Sugar Cupcakes
- 1 1/2 cups flour
- 1 teaspoon baking powder
- 1/4 teaspoon sea salt
- 1 stick of unsalted butter, at room temperature
- 1 cup plus 2 tablespoons packed light brown sugar
- 2 large eggs, at room temperature
- 1 teaspoon vanilla
- 1/2 cup plus 2 tablespoons buttermilk
Preheat oven to 325 °F. Line muffin tin with paper or foil liners.
In a medium bowl, combine flour, baking powder and salt.
In a large bowl, cream butter and brown sugar until pale and fluffy. Add eggs one at a time, beating after each until fully incorporated. Mix in vanilla extract. Add flour mixture to wet ingredients in 3 batches, alternating with 1/2 of the buttermilk, stirring after each until everything is combined.
Pour batter into prepared muffin tin until each liner is 3/4 full. Bake for around 25 minutes or until a toothpick inserted in the center comes out clean.
Salted Caramel Filling
- 1/2 cup sugar
- 3 tablespoons salted butter, cubed
- 1/4 cup plus 1 tablespoons heavy cream, at room temperature
In a medium saucepan, cook the sugar over medium heat, whisking as it melts. When it turns a deep amber color, add the butter and stir until it is melted. Add the heavy cream and whisk until the caramel is smooth. Remove from heat and let cool.
Using a large pastry tip or a paring knife, cut a small round piece out of the top of each cupcake. Pour in around 1-2 teaspoons of caramel. (To see a good description of how to do this go to 52 Kitchen Adventures)
Salted Caramel Buttercream Frosting
- 1/4 cup granulated sugar
- 2 tablespoons water
- 1/4 cup heavy cream
- 1 teaspoon vanilla extract
- 1 stick salted butter
- 1 stick unsalted butter
- 1/2 teaspoon sea salt
- 1 1/2 cups powdered sugar, sifted
- Fleur de sel for sprinkling (optional)
In a medium saucepan, combine sugar and water and cook over medium-high heat. Boil without stirring until it turns a deep amber color. Remove from heat and slowly pour in cream and vanilla, whisking until it is very smooth. Let cool for around 20 minutes, until it’s just barely warm and still pourable.
Meanwhile, beat butter and salt together until light and fluffy. Add powdered sugar and beat until thoroughly combined. Pour in the cooled caramel and beat on medium-high speed until light and airy (around 2 minutes). Spread or pipe onto filled cupcakes (if frosting is too runny, the caramel was too warm when added – refrigerate for around 15-20 minutes until frosting is stiffer). Sprinkle each cupcake with a small pinch of fleur de sel.
1: Farm cookies

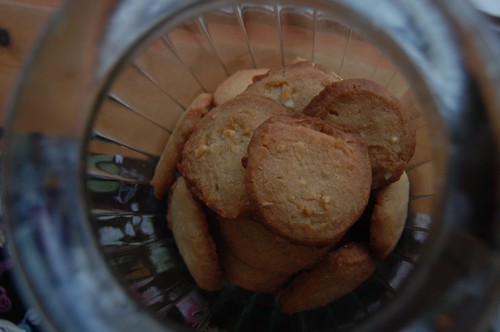
B-day baking!

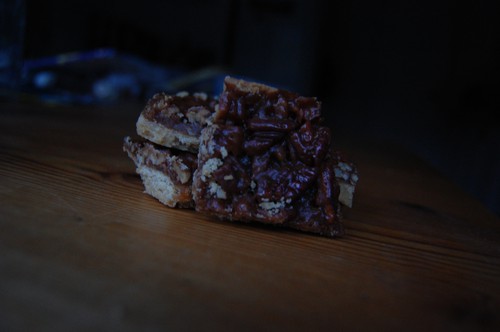
Pecan Pie Bars

But then after a few days I made my Boyfriend go to the covered market and get me some pecans! So on Friday I could finally make them! And they where worth the wait! They could be one of the best things I have ever made! Absolutely delicious!
If I have to complain about something it may be that the crust is a little bit to thick but that's just a minor detail.
These will defenitly be made many times more! Maby I will make them for my bday next month as I'm planing on just having a dessert buffe! I'm really looking forward to that and I'm already scaning the web for things to make that will just wow everybody! Maby I will make some goodiebags for the guest to take home tha't always appreciated.
Recipe from The Cherry on Top
What You Need
For crust:
2 sticks unsalted butter, softened
2/3 cup packed brown sugar
2 2/3 cups all-purpose flour
½ teaspoon salt
For topping:
1 stick (½ cup) unsalted butter
1 cup packed light brown sugar
1/3 cup honey
2 tablespoons heavy cream
2 cups chopped pecans
What You Need to Do
Preheat the oven to 350ºF and line a 9×13-inch pan with foil, leaving enough for a 2-inch overhang on all sides.
First make the crust by creaming together the butter and brown sugar until fluffy in a stand mixer fitted with the paddle attachment. Add in the flour and salt and mix until crumbly.
Press the crust into the foil-lined pan and bake for 18 minutes until golden brown.
While the crust bakes, prepare the filling by combining the butter, brown sugar, honey and heavy cream in a saucepan and stirring it over medium heat. Simmer the mixture for 1 minute, then stir in the chopped pecans.
Remove the crust from the oven and immediately pour the pecan filling over the hot crust spreading it to cover the entire surface.
Return the pan to the oven and bake an additional 18 minutes (I will reduce the time to 16 minutes for a softer caramel. But this i just a matter of taste so if you want it harder keep the 18 minutes or even up to 20 minutes).
Remove the pan and allow the bars to fully cool in the pan.
Use the foil overhang to lift out the bars and transfer them to a cutting board. Peel off the foil, slice into bars and serve.
Sorry for the bad photos but this time of year you get 2 hours of daylight on a good day and today was not one of those days. And I hate using the flash so i rather go for a darker photo. Bur A Cherry on Top have very nice photos on her blog.
Japanese Cheesecake
So said and done I put i all together sunday afternoon (after noticing that I'd bought the wrong cream cheese.. Had taken garlic and herb flavoured!), it was a bit tricky but it turned out great. Wasn't the prittiest cake I ever done but it tasted really good. Everyone liked it and it isn't as heavy as the other cheesecakes which is good after a big meal. I usually feel all stuffed after eating a cheesecake but you don't get that at all with this one.
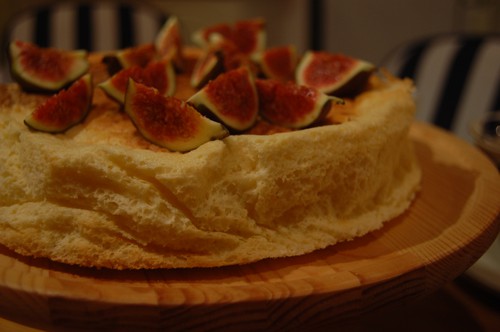
Don't really know why it inflated as much as it did but I still think it was okey for a first try. May not look as pritty as the photos I have seen but I hope for a better outcome next time. We just hade some fruit to go with it but it was quite good on its one to. Maby a bit flavourless if I'm being honest, think I will add some vanila extract next time just to get some flavour in to it.
The recipe I used came from this blog and had som greate tips! http://www.thelittleteochew.com/2011/03/japanese-cheesecake-tips-tricks.html
Early Christmas Baking
The christmas Stolle is a german christmas bread with rasins and almonds. I tweaked the recipe a little blitt by adding plums and crabarries. I also soaked them i glögg (mulled wine) instead of rum, just to give it a more swedish taste. Have just tasted a smal piece so far but that piece tasted really grate. Have also made one with only nuts just because my sister dosn't like fruit in bread and I plan on give my sisters one loaf each.
So over to the gingerbread dough whitch I made today. Hade do split the recipe in three, didn't think my machine could take the whole thing because it has 1,3 kg (28 pounds) flour in it. And I don't want to brake my machine on gingerbread! But now that's all done and the only thing left now is do the real gingerbread cookies but that will be tomorrow. And what is even better about tomorrow is the making of the lussekatter (Saffron buns)! My absolute christmas favorit! There's nothing like a freshly baked saffron bun!

The enormous gingerbread dough.
Gingerbread
Ingredients
4 3/4 dl Sugar
3 dl Syrup
350g Butter
1 tabelspoon grounded ginger
1 teaspoon grounded cinnamon
1 teaspoon grounded clove
3 dl cream
25,5 dl flour
1 tablespoon bicarbonate
Mix sugar and syrup for 10 minutes. Melt the butter and add to the suger/syrup with the spices.
Whip the cream slightly (just for 2-3 minutes), add together with the flour and bicarbonate. DO NOT add all the flour at the same time, take it one dl at the time. You almost never nead to use all 25,5 dl, the dough should not be sticky but you should get a little bit greasy when you touch it. And you will need some of that flour when you bake the cookies. Let the dough sit in the fridge over night, this will make it easier to work with.
Roll it pritty thin with your rolling-pin and then cut out the figures that you want. Bake in the oven (200-225 C (392-473 F)) for a couple of minutes.
This recpie make a huge dough (as seen in the picture) so unless you planing on making gingerbread for a small village half of it is probably enough.
Cristmas Stollen
Ingredients
¼ cup (60ml) lukewarm water (110º F / 43º C)
2 packages (4 1/2 teaspoons) (22 ml) (14 grams) (1/2 oz) active dry yeast
1 cup (240 ml) milk
10 tablespoons (150 ml) (140 grams) unsalted butter (can use salted butter)
5½ cups (1320 ml) (27 ozs) (770 grams) all-purpose (plain) flour (Measure flour first - then sift- plus extra for dusting)
½ cup (120 ml) (115 gms) sugar
¾ teaspoon (3 ¾ ml) (4 ½ grams) salt (if using salted butter there is no need to alter this salt measurement)
1 teaspoon (5 ml) (6 grams) cinnamon
3 large eggs, lightly beaten
Grated zest of 1 lemon and 1 orange
2 teaspoons (10 ml) (very good) vanilla extract
1 teaspoon (5 ml) lemon extract or orange extract
¾ cup (180 ml) (4 ¾ ozs) (135 grams) mixed peel (link below to make your own)
1 cup (240 ml) (6 ozs) (170 gms) firmly packed raisins
3 tablespoons (45ml) rum
12 red glacé cherries (roughly chopped) for the color and the taste. (optional)
1 cup (240 ml) (3 ½ ozs) (100 grams) flaked almonds
Melted unsalted butter for coating the wreath
Confectioners’ (icing) (powdered) sugar for dusting wreath
Soak the raisins
In a small bowl, soak the raisins in the rum (or in the orange juice from the zested orange) and set aside. See Note under raisins.
Pour ¼ cup (60 ml) warm water into a small bowl, sprinkle with yeast and let stand 5 minutes. Stir to dissolve yeast completely.
In a small saucepan, combine 1 cup (240 ml) milk and 10 tablespoons (150 ml) butter over medium - low heat until butter is melted. Let stand until lukewarm, about 5 minutes.
Lightly beat eggs in a small bowl and add lemon and vanilla extracts.
In a large mixing bowl (4 qt) (4 liters) (or in the bowl of an electric mixer with paddle attachment), stir together the flour, sugar, salt, cinnamon, orange and lemon zests.
Then stir in (or mix on low speed with the paddle attachment) the yeast/water mixture, eggs and the lukewarm milk/butter mixture. This should take about 2 minutes. It should be a soft, but not sticky ball. When the dough comes together, cover the bowl with either plastic or a tea cloth and let rest for 10 minutes.
Add in the mixed peel, soaked fruit and almonds and mix with your hands or on low speed to incorporate. Here is where you can add the cherries if you would like. Be delicate with the cherries or all your dough will turn red!
Sprinkle flour on the counter, transfer the dough to the counter, and begin kneading (or mixing with the dough hook) to distribute the fruit evenly, adding additional flour if needed. The dough should be soft and satiny, tacky but not sticky. Knead for approximately 8 minutes (6 minutes by machine). The full six minutes of kneading is needed to distribute the dried fruit and other ingredients and to make the dough have a reasonable bread-dough consistency. You can tell when the dough is kneaded enough – a few raisins will start to fall off the dough onto the counter because at the beginning of the kneading process the dough is very sticky and the raisins will be held into the dough but when the dough is done it is tacky which isn't enough to bind the outside raisins onto the dough ball.
Lightly oil a large bowl and transfer the dough to the bowl, rolling around to coat it with the oil. Cover the bowl with plastic wrap.
Put it in the fridge overnight. The dough becomes very firm in the fridge (since the butter goes firm) but it does rise slowly… the raw dough can be kept in the refrigerator up to a week and then baked on the day you want.
Preheat oven to moderate 350°F/180°C/gas mark 4 with the oven rack on the middle shelf.
Proof for approximately 2 hours at room temperature, or until about 1½ times its original size.
Bake the stollen for 20 minutes, then rotate the pan 180 degrees for even baking and continue to bake for 20 to 30 minutes. The bread will bake to a dark mahogany color, should register 190°F/88°C in the center of the loaf, and should sound hollow when thumped on the bottom.
Transfer to a cooling rack and brush the top with melted butter while still hot.
Immediately tap a layer of powdered sugar over the top through a sieve or sifter.
Wait for 1 minute, then tap another layer over the first.
The bread should be coated generously with the powdered sugar.
Let cool at least an hour before serving. Coat the stollen in butter and icing sugar three times, since this many coatings helps keeps the stollen fresh.
Recipe from: http://thedaringkitchen.com/recipe/christmas-stollen
